RECIPE: Row-Based Footswitch Setup: Difference between revisions
| (3 intermediate revisions by the same user not shown) | |||
| Line 37: | Line 37: | ||
* Go into layout edit mode by tapping the lower tools' pencil icon. | * Go into layout edit mode by tapping the lower tools' pencil icon. | ||
* Create a new radio button group. [[File:Radiobutton picker.png|frameless]] | * Create a new radio button group. | ||
[[File:Radiobutton picker.png|frameless]] | |||
* Tap on the radio buttons to pop up the editor. | * Tap on the radio buttons to pop up the editor. | ||
* Tap on the + next to ''Items Source'' | * Tap on the + next to ''Items Source'' | ||
| Line 43: | Line 44: | ||
* Tap ''List'' | * Tap ''List'' | ||
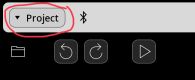
* Tap ''Project''. You will see a list of the project profiles. | * Tap ''Project''. You will see a list of the project profiles. | ||
* Uncheck any non-row profiles. Only the row profiles should be selected. [[File:Profile list.jpg|alt=profile list for radio buttons|frameless]] | * Uncheck any non-row profiles. Only the row profiles should be selected. | ||
[[File:Profile list.jpg|alt=profile list for radio buttons|frameless]] | |||
* Resize the radio button group so that it is one button high. Adjust the width as preferred. You should be able to resize it so that the buttons line up with your rows. | * Resize the radio button group so that it is one button high. Adjust the width as preferred. You should be able to resize it so that the buttons line up with your rows. | ||
You now have radio buttons that switch the profile for the desired row. | You now have radio buttons that switch the profile for the desired row. | ||
| Line 63: | Line 65: | ||
One Button, Many Pages: | One Button, Many Pages: | ||
<YouTube>ojchzpuJevI</YouTube> | <YouTube>ojchzpuJevI</YouTube> | ||
[[Category:Tips and Tricks]] | |||
Latest revision as of 05:00, 4 April 2026

For scene-based workflows, it is handy to have switches for the first, second, third, etc. clips of the active scene/row. One way of accomplishing this is to have one control profile per row with a radio button to make a row the active scene.
Overview
- Create a profile to control the clips in row 1.
- Set up the MIDI bindings for the row’s clips.
- Duplicate the new profile for use with another row and update the targets.
- Set up a radio button group to switch profiles and make a row active.
Create the Profile for Row 1
A project can have many profiles in it. We will leave the default profile alone so that it can be used for bindings that aren’t row-specific. I rename mine to Always to remind myself that it is always active. We use MIDI Learn mode for creating the profiles in this tutorial, but you can use the Control Settings panel if you prefer.
- Choose MIDI Learn from the main menu.
- In the upper-left corner is the profiles popup that shows which profile the bindings will be saved in.
- Tap on the pop down and rename the Default profile to Always. This is where you will have bindings that are always active. You don’t have to rename it, but it will make things easier to keep track of.
- Choose New Profile from the Project Profiles section.
- Give the new profile the name Row 1.
- Tap on the first clip in the row, tap your foot controller to learn it.
- Learn all the other clips in that row.
- Optional: Set up any double-tap and hold bindings for the clips.
- Leave MIDI Learn mode.
- View the profile that you just created by choosing Control Settings from the main menu.
- The profile should look something like this:


Create Profiles for The Remaining Rows
Create profiles for the remaining rows as you did for Row 1. I suggest naming them Row 2, Row 3, etc.
An alternate method is to duplicate the Row 1 profile in the Control Settings panel and update the targets for the bindings in the duplicated profiles. The MIDI Learn method is probably faster.
Whichever method you use, you should end up with a series of profiles as shown below:

Create Scene/Profile Selector
Now that we have profiles that map the footswitches to particular rows, we need create a radio button group to handle the profile switching.
- Go into layout edit mode by tapping the lower tools' pencil icon.
- Create a new radio button group.

- Tap on the radio buttons to pop up the editor.
- Tap on the + next to Items Source
- Choose the action Select Controller Profile. This makes the chosen profiles the source for the radio buttons.
- Tap List
- Tap Project. You will see a list of the project profiles.
- Uncheck any non-row profiles. Only the row profiles should be selected.

- Resize the radio button group so that it is one button high. Adjust the width as preferred. You should be able to resize it so that the buttons line up with your rows.
You now have radio buttons that switch the profile for the desired row.
Test that everything is set up correctly. Tap on a row and press a footswitch button. It should activate only a clip in the selected row.
Bells and Whistles
What we have done so far lets you change the row targeted by the footswitch by selecting a radio button. Depending on your workflow, there are a number of ways you might enhance the workflow:
- Add a row selecting MIDI Binding. I create a MIDI Binding in the Always profile to nudge the row selector. This lets me use my footswitch to advance the selected row. You may also want to add a HOLD action for the same MIDI message that selects the first row. That way you can easily jump to the first row. When you set up that binding turn on the option to defer other actions.
- You might add an action to the scene buttons to select that scene’s row selector when the scene is triggered
See Also
These YouTube videos from Michael may also be of interest:
Four Buttons to rule them all:
One Button, Many Pages: